
Did you know that over 60% of homeowners are prioritizing custom installations to enhance their living spaces? A well-designed media nook can be the perfect addition to your home, combining functionality with style. This project focuses on creating a seamless and elegant solution for organizing your entertainment setup.
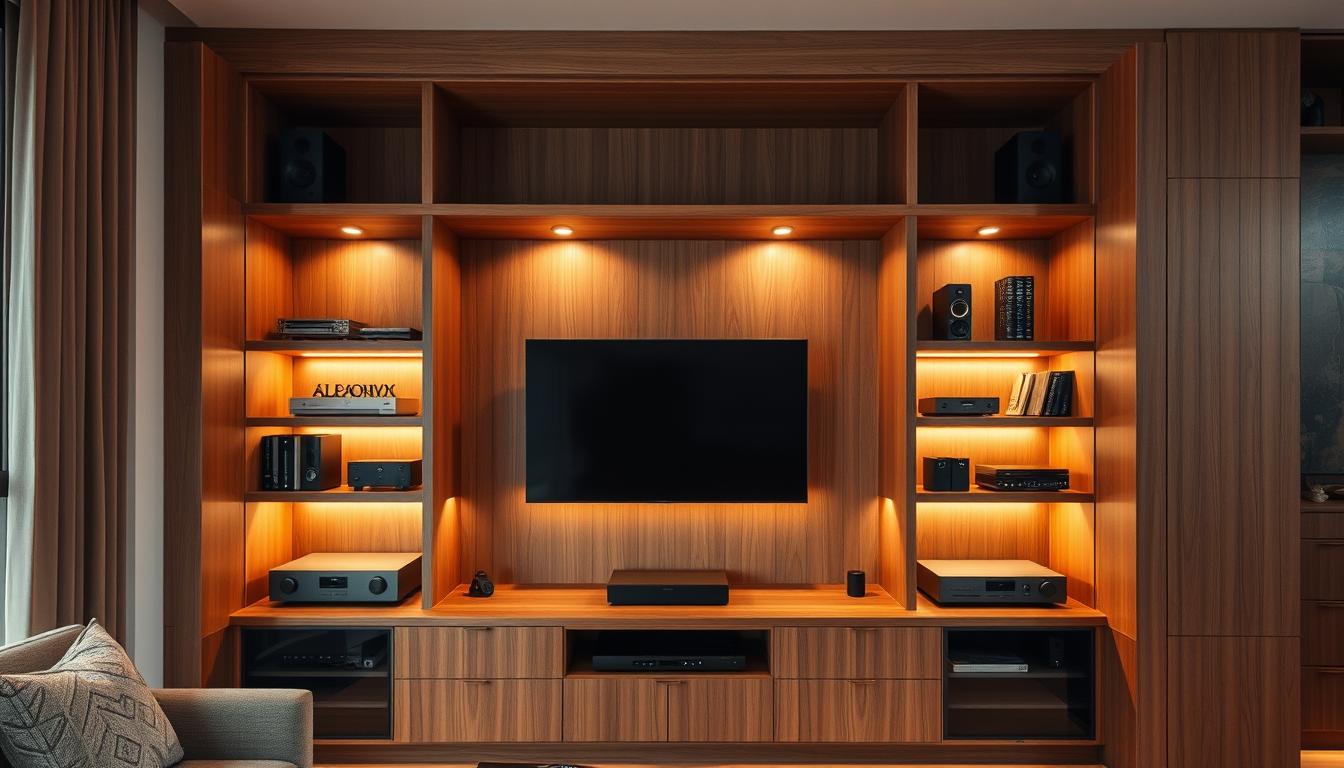
Using materials like hard maple, prefinished plywood, and walnut, this build ensures durability and a polished finish. The design includes built-in storage for gadgets, smart cable management, and optional LED lighting to elevate the ambiance. Each step is crafted with precision, from panel construction to advanced joinery techniques.
This project not only reduces clutter but also enhances the spacious feel of your room. Whether you’re a DIY enthusiast or seeking professional-grade results, this guide provides the tools and insights needed to create a stunning focal point in your home.
Key Takeaways
- Custom installations are preferred by over 60% of homeowners for their living spaces.
- Hard maple, prefinished plywood, and walnut ensure durability and a polished finish.
- Built-in storage and smart cable management reduce clutter significantly.
- Advanced joinery techniques and precise measurements are key to a professional result.
- Optional LED lighting enhances the ambiance of your media nook.
Project Overview & Planning
Start by defining your vision to guide the entire process. A clear concept ensures your media nook meets both functional and aesthetic needs. Assess your space, considering dimensions and existing decor, to create a design that blends seamlessly.

Strategic planning saves time and avoids costly mistakes. Break your project into manageable steps, from material selection to final assembly. This approach keeps you organized and ensures each phase is completed efficiently.
Defining Your Media Nook Concept
Your design should reflect your unique style while maximizing functionality. Consider built-in storage for gadgets and a shelf for media devices. Think about how the nook will end up fitting into your room’s overall layout.
Use materials like plywood and hardwood to ensure durability and a polished finish. These choices not only enhance the look but also provide long-lasting performance.
Scheduling, Budget, and Space Considerations
Create a realistic timeline that accounts for each step of the build. Allocate time for tasks like cutting, assembling, and finishing. This prevents delays and keeps your project on track.
Set a budget that includes material costs, tools, and any additional features like LED lighting. Prioritize quality wood and plywood to ensure a professional result without overspending.
Measure your space carefully to avoid fitting issues. Balance components like cabinets, panels, and trim to create a cohesive design. This attention to detail ensures your media nook looks polished and functions perfectly.
Materials & Tools You Will Need
The right materials and tools are the foundation of any successful project. Selecting high-quality supplies ensures your media nook is both durable and visually appealing. Start by gathering everything you need to streamline the process and avoid delays.

Wood, Plywood, and Hardwood Selection
Your choice of wood significantly impacts the final look and durability of your project. Prefinished maple plywood is a popular option for its smooth finish and ease of use. Hardwoods like walnut and maple add a touch of elegance and strength.
Consider the dimensions of your room when selecting materials. For example, 3/4-inch plywood is ideal for panels, while hardwood is perfect for trim and accents. Always plan ahead to ensure you have enough material for each step.
Essential Tools and Safety Gear
Having the right tools makes the job easier and safer. A TS55 Tracksaw ensures precise cuts, while a Festool Domino 500 simplifies joinery. Other essentials include a table saw, miter saw, and router table.
Safety should always come first. Wear protective gear like gloves, goggles, and a dust mask. Accessories like clamps and edge banders help achieve professional results. As the saying goes,
“Measure twice, cut once.”
| Material/Tool | Purpose |
|---|---|
| 3/4″ Prefinished Maple Plywood | Panels and cabinets |
| Walnut Hardwood | Trim and accents |
| TS55 Tracksaw | Precision cutting |
| Festool Domino 500 | Joinery |
| Safety Gear | Protection during work |
Proper preparation is the best way to ensure a smooth build. Gather all materials and tools before starting, and double-check your plan to avoid mistakes. With the right supplies, your media nook will be a standout feature in your room.
Preparing Your Lumber and Initial Setup
Proper preparation of your lumber ensures a seamless build process. Start by breaking down raw lumber into manageable blanks. This step is crucial for creating precise components that fit perfectly in your design.

Using a jointer, create a flat, square face on each piece. This ensures uniformity and stability throughout your project. A planer can then be used to achieve consistent depth across all boards. These tools are essential for achieving a professional finish.
Measure each piece carefully before cutting. This prevents errors and ensures all components align perfectly. Jointing and planing the stock prepares it for accurate assembly, which is critical for a sturdy cabinet.
Milling and Jointing Techniques
Maintaining uniform depth is key to a polished final product. Use a jointer to flatten one face and square an adjacent edge. This creates a solid foundation for further milling.
Next, run the boards through a planer to achieve consistent thickness. This step ensures all pieces are uniform, making assembly easier. As the saying goes,
“Precision in preparation leads to perfection in execution.”
Finally, measure and mark each piece for cutting. Double-check your measurements to avoid mistakes. Proper milling and jointing techniques lay the groundwork for a seamless finish and a durable build.
How to Build a Custom Wooden Media Nook
Efficiently breaking down lumber ensures precision in your project. Start by organizing your milled blanks into categories like doors, panels, and drawers. Label each piece clearly to avoid confusion during assembly. This step saves time and reduces errors.

Use a miter gauge for cross-cutting to achieve consistent angles. A track saw is ideal for long, straight cuts. Batching similar cuts improves efficiency and ensures uniformity across all parts. As the saying goes,
“Measure twice, cut once.”
Labeling and Organizing Components
Labeling is crucial for keeping track of multiple parts. Use a marker to write the purpose and dimensions on each piece. For example, mark panels for the cabinet and drawers separately. This method ensures smooth assembly and minimizes mistakes.
Organize parts into groups based on their function. Store them in a designated area to maintain order. This approach keeps your workspace tidy and your project on track.
Precise Cutting with Miter and Track Saws
Accurate cuts are the foundation of a professional-quality build. A miter saw is perfect for angled cuts, while a track saw excels at long, straight edges. Always double-check measurements before cutting to ensure precision.
Batching similar cuts saves time and improves consistency. For example, cut all panels for the cabinet at once. This technique reduces setup time and ensures uniformity across all parts.
| Tool | Purpose |
|---|---|
| Miter Saw | Angled and cross-cutting |
| Track Saw | Long, straight cuts |
| Marker | Labeling parts |
Proper tool alignment is essential for flawless execution. Use clamps to secure pieces during cutting. This ensures stability and prevents errors. With these techniques, your project will achieve a polished, professional finish.
Joinery Techniques for a Durable Build
Mastering joinery techniques is essential for creating a sturdy and visually appealing cabinet. Precision in joinery ensures that your project not only looks professional but also stands the test of time. This section dives into two key methods: tongue & groove assembly and Festool Domino joinery.

Tongue & Groove Assembly Methods
The tongue & groove method is ideal for creating strong, seamless joints. This technique involves cutting a protruding “tongue” on one piece and a matching “groove” on another. When assembled, these pieces lock together tightly, eliminating the need for mechanical fasteners.
To achieve clean tongues, use a tenon jig with your table saw. Set up a dado stack to ensure precise cuts. This setup allows you to create uniform grooves that fit perfectly. As the saying goes,
“Precision in preparation leads to perfection in execution.”
Utilizing Domino Joinery and Adhesives
Festool Domino joinery is another excellent option for durable builds. This method uses floating tenons to align and strengthen joints. The Domino machine ensures consistent spacing and depth, making it easier to assemble complex structures.
Combine Domino joinery with high-quality adhesives for added strength. Apply the adhesive evenly to the tenons and grooves before assembly. This ensures a secure bond that enhances the overall durability of your cabinet.
- Tongue & Groove: Perfect for doors and side panels, ensuring seamless joints.
- Domino Joinery: Ideal for alignment and strength, especially in complex builds.
- Adhesives: Use high-quality glue to reinforce joints and improve longevity.
Proper joinery techniques not only enhance the structural integrity of your project but also contribute to its aesthetic appeal. For more tips on creating a functional and stylish space, explore our guide on acoustic treatment to complement your media nook.
Door and Panel Construction
Crafting doors and panels requires precision and attention to detail. This step ensures your project achieves a professional finish. Focus on techniques like raised panel routing and frame & panel assembly for a polished look.

Creating Raised Panels with Your Router Table
Using a router table with a raised panel bit, you can create elegant designs. Start by securing your board and setting the bit to the desired depth. This method ensures uniformity across all panels.
For added strength, glue multiple boards together. This creates the perfect thickness and enhances durability. Adjust the size of each panel to fit your design seamlessly.
Constructing Frame & Panel Doors for Perfect Fit
Frame & panel doors require precise measurements. Use a Kreg Pocket-Hole Jig to drill holes for assembly. This ensures a tight fit and eliminates gaps.
Clamp the frames securely during glue-up. This prevents warping and ensures a professional finish. Adjust for slight differences in size by trimming edges carefully.
| Tool | Purpose |
|---|---|
| Router Table | Creating raised panels |
| Kreg Pocket-Hole Jig | Drilling assembly holes |
| Clamps | Securing frames during glue-up |
By following these steps, your doors and panels will have a refined, professional appearance. This attention to detail elevates the overall build and ensures long-lasting performance.
Constructing the Media Console Base
Constructing the base of your console is a critical step in ensuring stability and functionality. This phase involves cutting and assembling plywood case parts, followed by installing shelf pin holes for adjustable shelving. Precision here ensures a strong foundation for the entire structure.

Cutting and Assembling Plywood Case Parts
Start by breaking down a single sheet of 3/4″ plywood into multiple case parts. Use a track saw for efficient and precise cuts. Label each piece clearly to avoid confusion during assembly. This organization saves time and reduces errors.
Glue partition pieces together to create a sturdy framework. Ensure the back panel is securely attached using 1 1/4 inch screws. This step provides steadfast support for the console’s structure.
Efficiently Installing Shelf Pin Holes
Creating shelf pin holes requires careful planning. Use a jig and double-sided tape to mark and drill holes accurately. Measure twice to ensure each hole aligns perfectly with the shelves.
For adjustable shelving, pre-drill holes at consistent intervals. Secure the shelves with pins and screws to maintain alignment. This method allows flexibility in shelf placement while ensuring stability.
“Accuracy in drilling ensures a seamless fit for all components.”
- Track Saw: Ideal for precise plywood cuts.
- Jig: Ensures uniform shelf pin holes.
- Screws: Provide secure fastening for structural integrity.
By following these steps, you’ll construct a robust base that supports the top and door assemblies flawlessly. Attention to detail here ensures a polished and functional final product.
Finishing Touches and Edge Banding
Achieving a polished finish is the final step in creating a professional-looking media nook. This phase focuses on refining edges and surfaces to ensure a seamless and elegant appearance. Proper techniques here elevate the overall look of your project.

Applying Edge Banding and Trim Molding
Edge banding is essential for covering exposed plywood edges. Use pre-finished maple edge banding for a clean and durable finish. Heat activation ensures the banding adheres smoothly to the surface.
Trim molding adds a decorative touch while hiding gaps. Apply it to the edges of shelves and panels for a cohesive look. Tools like flush cutters and edge breakers help achieve smooth, chip-free finishes.
Chamfering, Flush Cutting, and Cleanup Steps
Chamfering edges with a router table creates a sophisticated transition between surfaces. This technique adds a refined touch to your media nook. Adjust the router bit to achieve the desired angle.
Flush cutting removes excess edge banding for a seamless finish. Use a sharp utility knife or flush cutter for precision. Cleanup involves sanding any rough spots and wiping away dust.
“Attention to detail in finishing ensures a professional and polished result.”
| Tool | Purpose |
|---|---|
| Flush Cutter | Trimming excess edge banding |
| Router Table | Chamfering edges |
| Utility Knife | Precision cutting |
By following these steps, you’ll achieve a refined and professional look for your media nook. These finishing touches ensure every visible surface complements the overall design.
Installation and Final Assembly Details
Final assembly is the moment where precision meets functionality, ensuring every component aligns perfectly. This phase focuses on securing the walnut top, installing doors, and adjusting the cabinet structure for a seamless finish. Attention to detail here ensures your project meets professional standards.
Aligning the Top, Doors, and Cabinet Structure
Start by aligning the walnut top with pre-drilled holes. This allows for wood expansion and contraction while maintaining structural integrity. Use clamps to hold the top in place, ensuring it fits snugly against the cabinet.
For doors, attach hinges carefully to ensure smooth operation. Adjust the pocket holes for screws to achieve a perfect fit. Reposition components as needed to eliminate gaps and ensure alignment.
Secure the cabinet structure using screws and clamps. Double-check measurements to confirm everything is level and aligned. This step ensures the entire unit is stable and functional.
“Precision in assembly ensures a polished and professional result.”
Final Checklist for Professional Standards
Before completing the project, run through a final checklist:
- Confirm all joints are tight and secure.
- Check that doors open and close smoothly.
- Ensure the top is level and flush with the cabinet.
- Inspect for any gaps or misalignments.
- Sand any rough edges with fine grit sandpaper for a smooth finish.
| Tool | Purpose |
|---|---|
| Clamps | Securing components during assembly |
| Screwdriver | Adjusting hinges and screws |
| Level | Ensuring alignment |
By following these steps, you’ll achieve a flawless final assembly that enhances your living room setup. This attention to detail ensures your project is both functional and visually appealing.
Conclusion
Creating a functional and stylish entertainment space requires careful planning and precision. From selecting quality materials like hard maple and walnut to mastering advanced techniques with a router, each step contributes to a polished result. Attention to detail, such as measuring width and using tape for alignment, ensures every component fits seamlessly.
For those seeking additional guidance, detailed tutorial videos and downloadable plans are available. These resources can help refine your skills and inspire future projects. Customizations like adjustable shelving or LED lighting can further enhance your setup, making it both practical and visually appealing.
By embracing a hands-on approach, you’ll not only achieve a professional finish but also extend the life of your project. Whether it’s your first build or you’re refining your craft, these steps ensure success year after year.
FAQ
What type of wood is best for a media nook?
Plywood and hardwood are excellent choices for durability and aesthetics. Maple, oak, or walnut are popular hardwood options, while Baltic birch plywood offers stability for the cabinet structure.
What tools are essential for this project?
You’ll need a miter saw, track saw, router table, domino joiner, and clamps. Safety gear like goggles and gloves is also crucial for protection.
How do I ensure precise cuts for the cabinet parts?
Use a track saw or miter saw for accuracy. Label each piece after cutting to avoid confusion during assembly.
What joinery method works best for durability?
Tongue & groove and domino joinery are reliable techniques. Pair them with wood glue for a strong, long-lasting build.
How do I create raised panels for the doors?
Use a router table with a raised panel bit. This technique adds a professional touch to your frame & panel doors.
What’s the best way to install shelf pin holes?
A shelf pin jig ensures even spacing and alignment. Drill the holes before assembling the cabinet for precision.
How do I apply edge banding for a clean finish?
Use an edge banding iron to adhere the trim. Trim excess material with a flush trim bit for a seamless look.
What’s the ideal finish for a media nook?
A polyurethane or lacquer finish protects the wood while enhancing its natural grain. Sand with 220-grit sandpaper before applying.
How do I align the doors and cabinet structure?
Adjust the hinges carefully to ensure the doors are level. Use shims if necessary to achieve a perfect fit.
Can I customize the size of the media nook?
Absolutely. Measure your living room space and adjust the depth, width, and height to fit your needs. Plan the dimensions before cutting the lumber.
