
Did you know that over 70% of DIY enthusiasts prefer projects that combine functionality with vintage charm? This project does just that, transforming a simple wooden piece into a stunning movie reel shelf. Inspired by classic cinematic aesthetics, it’s a perfect blend of creativity and practicality.
Starting with a blank stencil from Joann’s, the process involves painting, cutting, and decoupaging images to create a film strip effect. Similar to a previous project, this technique ensures a unique and eye-catching design. Even materials like MDF can be used, making it accessible for all skill levels.
To ensure durability, a top coat of poly seals the design, adding a sleek finish. This project not only enhances your space but also celebrates the timeless appeal of vintage film reels. For more tips on creating a dedicated home theater space, check out this comprehensive guide.
Key Takeaways
- Transform a plain wooden piece into a stylish movie reel shelf.
- Inspired by vintage cinematic aesthetics and DIY ingenuity.
- Use stencils and decoupage for a unique film strip effect.
- Materials like MDF work well with proper techniques.
- Protective coatings like poly ensure durability and a sleek finish.
Introduction: Setting the Stage for Your Cinematic DIY
Imagine stepping into a room where every detail whispers cinematic nostalgia. This project is your chance to bring that vision to life. By combining creativity with practicality, you can craft a piece that celebrates the golden age of film.
Think of your finished shelf as more than just a functional item. It’s a statement piece that adds vintage charm to any wall. Whether you’re a seasoned DIY enthusiast or a beginner, this guide will walk you through every step.

To create the perfect media room, focus on key elements like lighting and projector-inspired details. Proper lighting can transform the ambiance, making your space feel like a classic theater. Use a light table or window for viewing images, ensuring every detail shines.
Here’s a quick overview of what you’ll need to consider:
| Element | Purpose |
|---|---|
| Lighting | Enhances the cinematic mood |
| Projector | Adds a touch of vintage technology |
| Vintage Film Reels | Provides authenticity and charm |
| Wall Space | Ensures the shelf is a focal point |
Set the mood with a bowl of popcorn and your favorite classic film. Let your imagination run wild as you envision the finished product. This isn’t just a DIY project—it’s a journey into the heart of cinematic history.
Materials and Tools for Your DIY Project
Crafting a unique piece starts with the right materials and tools. Whether you’re aiming for a vintage look or a modern twist, selecting quality supplies ensures your project stands out. From wood to alternative materials, every choice impacts the final result.

Selecting Quality Wood and Alternative Materials
High-quality wood like oak or maple is ideal for durability and aesthetics. If you’re on a budget, consider alternatives like MDF or plywood. These materials are cost-effective and work well with proper techniques.
For a touch of sophistication, incorporate metal accents or glass elements. These additions elevate the design, making your shelf a statement piece. Remember, the right material choice sets the tone for the entire project.
Essential Tools and Equipment Overview
Precision is key, so invest in reliable tools. A machine like a table saw ensures clean cuts, while hand tools like measuring tapes and clamps provide accuracy. Power tools like drills and sanders make assembly efficient and sturdy.
Don’t forget accessories like a camera tripod for stability or storage solutions for your tools. Quality art supplies, such as brushes and paints, add the finishing touches. Proper equipment not only simplifies the process but also enhances the final product.
| Material/Tool | Purpose |
|---|---|
| Oak Wood | Durability and classic look |
| MDF | Budget-friendly alternative |
| Table Saw | Precise cutting |
| Metal Accents | Adds sophistication |
| Glass Elements | Enhances visual appeal |
With the right materials and tools, your DIY project will not only be functional but also a work of art. Take your time to source quality items, and your efforts will pay off in the final result.
How to Construct a Wooden Movie Reel Shelf
Bringing vintage charm to your space starts with a well-planned design. Begin by measuring your wall area to ensure the shelf fits perfectly. Use a pencil and ruler to mark the dimensions, mimicking the circular shape of a film reel.
Next, cut the wood using a table saw for precision. If you’re working with MDF, ensure the edges are smooth. Sand the surfaces to remove any roughness, preparing them for painting.

Assemble the pieces using wood glue and clamps for stability. For added strength, incorporate iron brackets at the joints. This ensures the shelf can hold the weight of your items without sagging.
Apply a base coat of paint in a neutral color, allowing it to dry completely. Use stencils to create a film strip effect, adding vintage details. Decoupage images of classic film reels for an authentic touch.
Finally, seal the design with a protective top coat. This not only enhances durability but also gives the shelf a sleek finish. Mount it on the wall using sturdy brackets, ensuring it’s level and secure.
- Measure and plan the layout for a reel-inspired design.
- Cut and assemble pieces with precision using machine tools.
- Apply consistent paint and decoupage techniques for a vintage look.
- Use iron brackets for added stability and durability.
With these steps, you’ll create a functional and stylish piece that celebrates the golden age of cinema. Pair it with a projector and a bowl of popcorn for the ultimate vintage vibe.
Step-by-Step Construction Process
Creating a vintage-inspired piece requires precision and attention to detail. This section will guide you through the essential steps to build a sturdy and visually appealing shelf. From measuring to painting, each step is designed to ensure a professional-level outcome.
Measuring, Cutting, and Assembling Your Pieces
Start by measuring your wall space to determine the shelf’s dimensions. Use a pencil and ruler to mark the wood, ensuring it mimics the circular shape of a film reel. Precision is key here, so double-check your measurements before cutting.
Next, cut the wood using a table saw for clean, accurate edges. If you’re working with MDF, sand the surfaces to remove roughness. Smooth edges ensure a polished look and prevent splinters during assembly.
Assemble the pieces using wood glue and clamps for stability. For added strength, incorporate iron brackets at the joints. This ensures the shelf can handle the weight of your items without sagging. Proper alignment is crucial for both aesthetics and functionality.

Painting Techniques and Protective Coatings
Apply a base coat of paint in a neutral color, allowing it to dry completely. Use stencils to create a film strip effect, adding vintage details. Decoupage images of classic movie reels for an authentic touch.
Finally, seal the design with a protective top coat. This not only enhances durability but also gives the shelf a sleek finish. A polyurethane coating works well to protect the surface from scratches and wear.
| Step | Tools/Materials |
|---|---|
| Measuring | Ruler, Pencil |
| Cutting | Table Saw, Sandpaper |
| Assembling | Wood Glue, Clamps, Iron Brackets |
| Painting | Base Coat, Stencils, Decoupage Images |
| Protective Coating | Polyurethane Sealant |
By following these steps, you’ll create a functional and stylish piece that celebrates the golden age of cinema. Proper alignment and weight distribution ensure the shelf is both sturdy and visually appealing.
Decoupage and Vintage Techniques for a Retro Look
Adding a touch of retro flair to your space can transform it into a nostalgic haven. By combining decoupage and vintage techniques, you can create a piece that feels like it’s straight out of a classic film. These methods are perfect for evoking the charm of a bygone era while adding a personal touch to your decor.

Stencil Creation and Application Tips
Start by designing a custom stencil to mimic the outlines of a film strip. Use sturdy materials like acetate or cardboard for durability. Trace your design carefully, ensuring clean lines for a professional finish.
When applying the stencil, secure it firmly to the surface with tape. Use a dry brush technique to prevent paint bleeding. This method ensures crisp edges and a polished look. For added depth, layer multiple stencils to create intricate patterns.
Decoupage Methods for an Authentic Vintage Finish
Decoupage involves layering images and textures to achieve a vintage aesthetic. Begin by selecting high-quality images of classic movie reels or projector designs. Cut them precisely to fit your shelf’s dimensions.
Apply a thin layer of decoupage glue to the surface, then carefully place the images. Smooth out any air bubbles with a soft cloth. Once dry, seal the design with a protective top coat. This ensures durability while maintaining the retro charm.
For a cohesive look, incorporate projector-inspired accents like metal gears or popcorn motifs. These details intensify the nostalgia and make your shelf a true conversation piece. Balance modern durability with vintage aesthetics by choosing the right materials and techniques.
- Design custom stencils for precise film strip outlines.
- Use decoupage to layer images and textures for a vintage feel.
- Select durable paints and protective coatings for a lasting finish.
- Add projector-inspired accents to enhance the retro look.
- Combine modern techniques with vintage charm for a timeless piece.
Mounting and Multi-Functional Wall Applications
Maximizing wall space with a functional yet stylish shelf can elevate any room’s design. Whether you’re creating a media room or adding storage to a cozy corner, the right mounting techniques ensure stability and versatility. This section explores secure methods to install your shelf while highlighting its dual purpose as both decor and storage.

Secure Mounting Methods for Stability
Proper mounting starts with robust hardware. Use iron brackets and heavy-duty wall anchors to support the shelf’s weight. This ensures it remains stable, even when holding heavier items like books or decor.
For added security, consider mounting the shelf sideways under a window. This creative approach transforms it into a ledge or bookcase, maximizing space in smaller rooms. Always double-check the alignment to ensure it’s level and secure.
Another effective method is using L-shaped brackets. These provide extra support, especially for longer shelves. Pair them with wall studs for maximum durability. This combination ensures your shelf can handle daily use without compromising its structure.
Dual Purpose: Decor and Storage
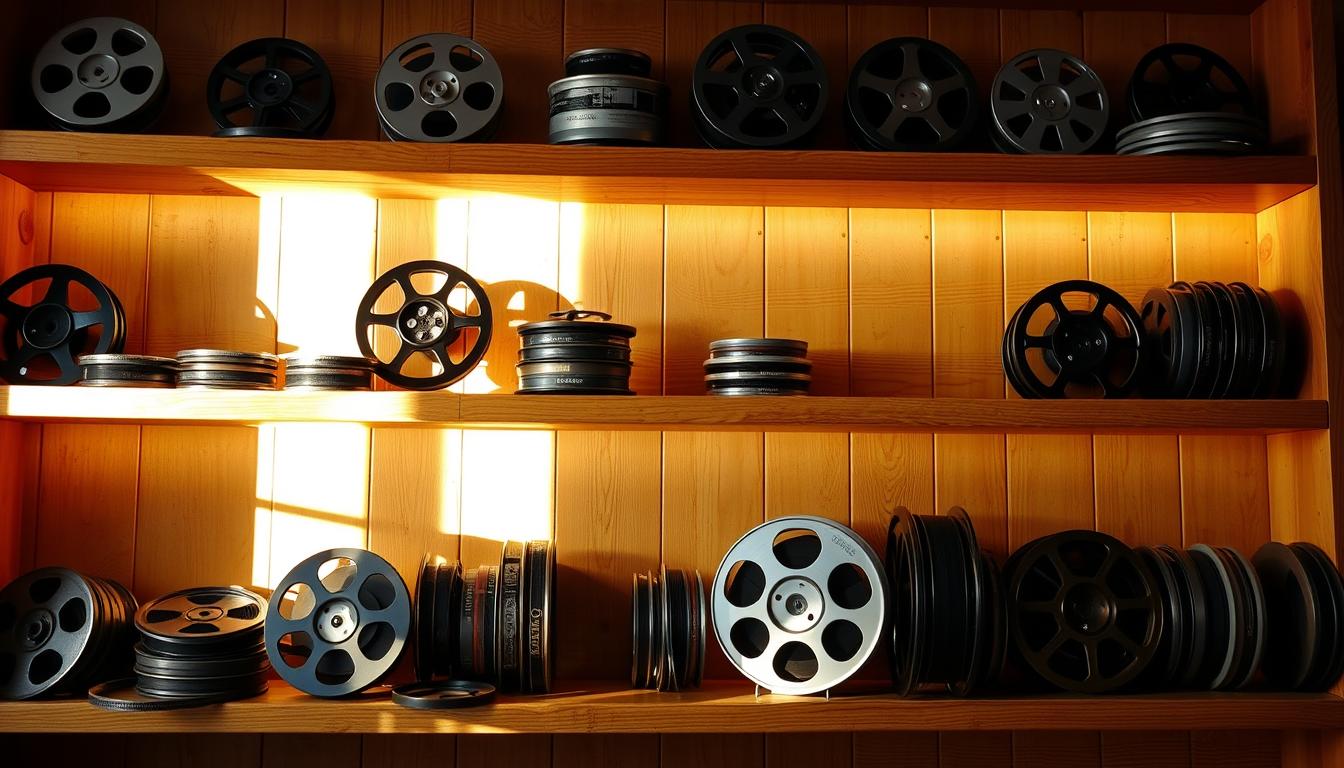
Your shelf isn’t just for storage—it’s a statement piece. In a media room, it can display vintage film reels or hold a projector. This dual functionality makes it a practical and stylish addition to any space.
Integrate lighting to enhance its visual appeal. LED strips or small lamps can highlight the shelf’s design, creating a focal point in the room. For a cinematic touch, add a camera or projector-inspired accent.
Consider using the shelf to organize smaller items like cups or decorative stars. This keeps your space tidy while adding a personal touch. The possibilities are endless, making it a versatile addition to your home.
- Use iron brackets and wall anchors for secure installation.
- Mount sideways under a window for a dual-purpose ledge or bookcase.
- Incorporate lighting and camera accents for enhanced visual appeal.
- Organize smaller items like cups or stars for added functionality.
- Ensure proper alignment and weight distribution for long-term durability.
By combining secure mounting techniques with creative applications, your shelf becomes more than just a functional item. It’s a design element that enhances your space while celebrating practicality and style.
Creative Customization Ideas to Enhance Your Space
Transform your space into a personalized haven by blending unique materials and vintage touches. This approach not only adds character but also makes your decor truly one-of-a-kind. Whether you’re crafting a media room or updating a cozy corner, these ideas will inspire you to think outside the box.
Integrating Unique Elements like Metal, Glass, and Lighting
Adding metal accents can instantly elevate your shelf’s design. Consider using iron brackets or decorative gears for a touch of industrial charm. Pair these with glass elements, such as small panels or shelves, to create a sleek, modern contrast.
Lighting plays a crucial role in setting the mood. Incorporate LED strips or small lamps to highlight your shelf’s features. For a cinematic vibe, use dimmable lights that mimic the ambiance of a classic theater. These elements work together to create a focal point in any room.
Personalization Techniques Using Vintage Items
Personalize your shelf with vintage items that tell a story. Repurpose old film reels, vinyl records, or even a retro camera to add nostalgic charm. These pieces not only enhance the decor but also make your space feel uniquely yours.
Mix and match textures and finishes to create a balanced look. For example, combine matte paint with glossy decoupage images for a dynamic effect. This approach ensures your shelf stands out as a statement piece in your home.
- Use metal accents and glass elements for a modern yet timeless look.
- Incorporate creative lighting to enhance the shelf’s visual appeal.
- Personalize with vintage items like film reels or vinyl records.
- Mix textures and finishes for a balanced, artistic design.
- Create a focal point that complements your space and style.
By integrating these ideas, you’ll craft a shelf that’s not just functional but also a reflection of your personality. Let your creativity shine and transform your room into a space that inspires.
Conclusion: Bringing Your DIY Vision to Life
Turn your space into a tribute to the bygone era of film with this DIY endeavor. From selecting materials to applying finishing touches, every step brings your cinematic vision closer to reality. This project isn’t just about storage—it’s a celebration of vintage charm and modern functionality.
Your finished piece will transform any room into a mini home theater or creative haven. Balance weight distribution for stability and add decorative touches like black-and-white accents for a polished look. The blend of art and practicality ensures your shelf stands out as a statement piece.
Embrace the process and let your creativity shine. Share your completed project as a testament to the power of DIY design. Every detail, from the film reel accents to the final coat of paint, brings your space to life.
Start today and create a piece that honors the golden age of cinema while enhancing your decor. Your cinematic vision is just a few steps away!
FAQ
What materials are best for building a wooden movie reel shelf?
Pine or oak are excellent choices for durability and aesthetics. You can also consider alternative materials like MDF for a lighter option.
What tools are essential for this DIY project?
You’ll need a saw, drill, sander, measuring tape, and clamps. These tools ensure precision and efficiency during construction.
How do I achieve a vintage look for my shelf?
Use decoupage techniques or stencils to add retro designs. Applying a distressed paint finish can also enhance the vintage appeal.
Can I customize my shelf with additional elements?
Absolutely! Incorporate metal accents, glass panels, or LED lighting to make your shelf unique and functional.
How do I securely mount the shelf on the wall?
Use wall anchors or stud finders to ensure stability. For heavier shelves, consider L-brackets for added support.
What protective coatings should I use for longevity?
Apply a clear polyurethane sealant or varnish to protect the wood from wear and tear while maintaining its finish.
Can this shelf be used for other purposes?
Yes! It’s versatile and can store vinyl records, books, or serve as a decorative display for other collectibles.
