
How To Mount Projector To Ceiling Drywall
Today we are discussing how to mount projector to ceiling drywall. What happened? You were installing your projector and your layout landed the projector smack in the middle of two ceiling joists right? There are different methods to mounting projectors to ceiling drywall so lets look at them now.
Although you might have considered different ways to mount your ceiling projector into drywall there is one good way and lots of mediocre ways and one way that requires alot more work but is the best way.
Mediocre Ways To Mount Projector
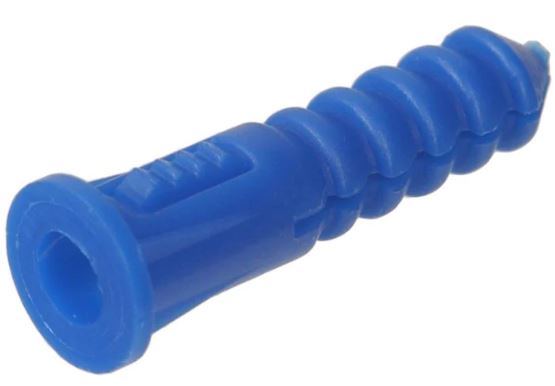
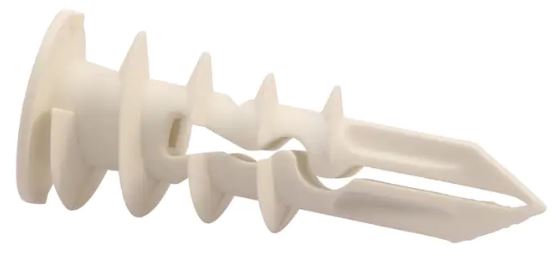
Basically it comes down to choosing which drywall anchors will best serve its purpose. The first type of anchor is the friction type. These anchors or sometimes referred to as shield. They are designed to expand into a predrilled hole as the screw is forced into the opening. Thus creating a friction connection between the drywall and the screw with the plastic anchor as the buffer or frictional medium
Notice the teeth towards the back of the acnchor and the ribbed portion is split. As the screw enters the anchor the ribbed portiion spreads apart making the anchor and screw wider than the predrilled hole. The teeth are there to hold it in place as you turn the screw to keep the anchor from spinning around.
I do not recommend these anchors for mounting your projector into ceiling drywall because drywall is not very dense and can deteriorate and eventually loosen the connection. Not a good idea since this could likely fall on someones head. see fig 1
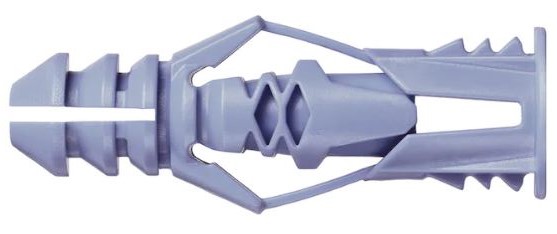
The next anchor is very similar to the shield but has a variant to it. It is still designed to spread apart but this one stays together to create a toggle. This is a bit better than the shield mentioned above but its made of plastic and you can not rely totally on plastic since the force is directly pulling on the threads. see fig 2.
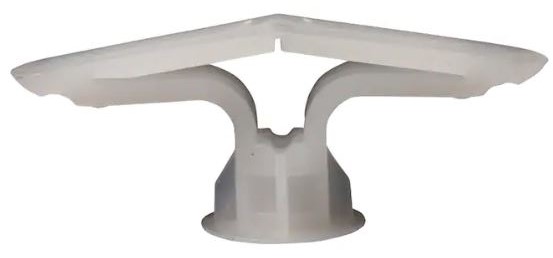
The next anchor acts just like a toggle but it is made up of plastic. How well can plastic hold the screws? Also these anchors if not deployed exactly can malfunction or spin around in the hole making your installation a pain. see fig 3
[fig 3 toggler]
https://mobileimages.lowes.com/product/converted/036296/036296503000_08279112.jpg?size=pdhi
The next type of anchor is sometimes referred to as an Easy Anchor or SnapSkru. These are made of plastic or metal and do not require predrilling. The sharp tip works its way into the soft drywall and screws into the drywall creating a connection. The same precaution applies here. Whether it plastic or metal you are still relying on the drywall material to hold your connection. No problem for walls but for ceiling I would not recommend for heavy items such as a home theater projector. see fig 4
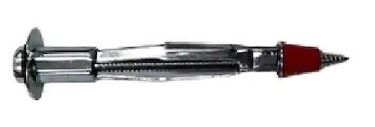
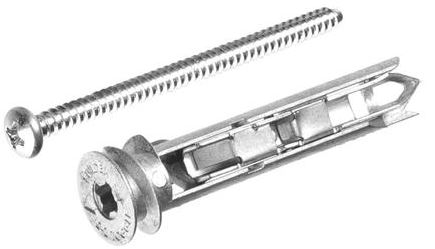
The next type of anchor is a hybrid between friction and toggle and is made of metal. It could possibly be used to hold heavier equipment. You predrill a hole put the anchor in and as the screw tightens it pulls the fingers into the back of the drywall. It creates fingers/butterflies but they are small. See fig 5.
Those were the mediocre anchors. You could probably get away with using them but if you want to sleep at night you might want to look at the next three good connection types.
Good Ways To Mount Projector
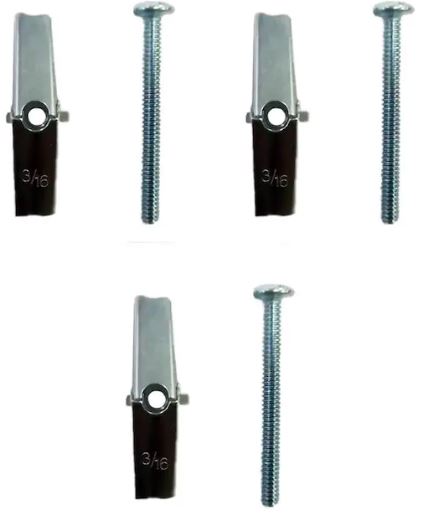
Are you looking for good drywall anchors? Toggle bolts are the key to mounting heavy equipment to ceiling drywall but not too heavy. Toggle bolts form a perpendicular resistance to the force and are threaded metal to metal. The only way these anchors can fail is for the fingers or butterflies to rip completely through the drywall. That will take a lot more force to fail when compared to the friction type anchors.
The toggle bolts consist of a screw and a spring loaded butterfly. First hold your mounting bracket against the drywall where it supposed to go and mark the holes on the ceiling. You need to predrill a hole big enough to allow the butterfly to pass through to engage the drywall. Start the screw a few threads in to the butterfly, fold the butterfly closed and push the butterfly through the hole. The trick here is you have to put the screw through the mounting plate of the projector first then into the butterfly. It’s a little awkward so if there are four mounting holes start all four screws then push one through each hole until all four butterflies are snapped open behind the drywall. This leaves the mounting bracket suspended off the ceiling being held by the butterflies. Now you can screw the bracket tight to the drywall. See fig 6
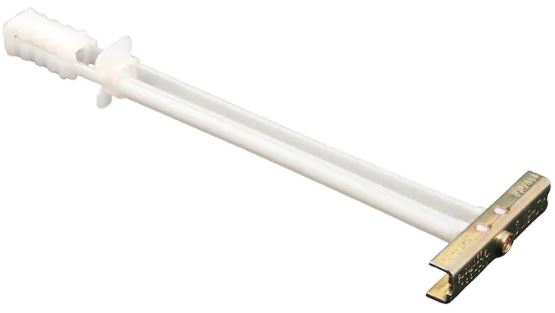
There are two toggle bolt designs that will make your installation a bit easier because you dont have to finagle with the mounting bracket while threading the toggle bolts through the holes. Sometimes referred to as easy toggles. This design allows you to set up the butterfly in the hole first then hold the bracket and screw them in. See fig 7
Then there is the EZ-Toggle which acts like an easy anchor but transforms into a toggle which is all metal. You mark the hole locations no predrilling needed. Screw the anchors in hold up the mounting bracket and screw the screws in. As the screw goes into the acnhor it spins the finger/butterfly sideways and engages the drywall. See fig 8
Those were the good ways to mount your projector to ceiling drywall but the best way to mount is more work. It may be an option you consider especially if you are looking to mount a cabinet or heavier than normal equipment.
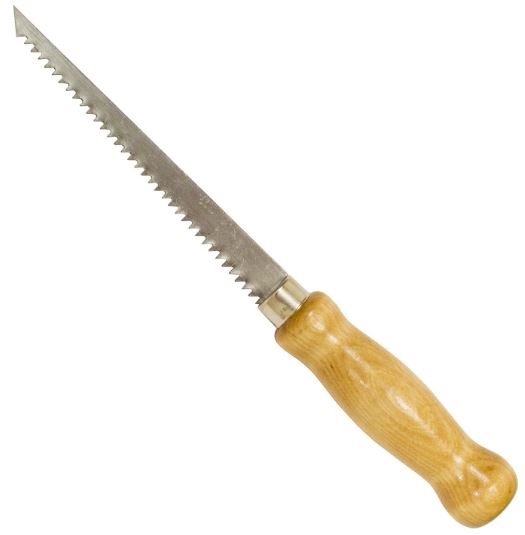
You will need to take a keyhole saw fig. 9 and cut a square out of the drywall. Cut it about fourteen inches from ceiling joist to ceiling joist 14 1/2in X 14 1/2in. Make sure you cut the ceiling drywall nicely in one piece because you will reuse it. Then cut a piece of 3/4″ plywood 14 9/16in X 14 1/4in. Cut the plywood about 1/16″ bigger between the ceiling joists for a tight fit and 1/4in smaller the other way so you don’t have to wrestle with it too much. Tap the plywood into the opening with your hammer between the joists. This will keep the plywood in the opening for you without the need to hold it. Make sure the plywood is flush with the joists not the drywall. Predrill holes on an angle from the plywood to the ceiling joists. Take 2 1/2″ deck screws and screw the plywood into the joists. Now screw the drywall you saved back into the plywood with 1 1/4″ drywall screws. Spackle and paint the seams.
What you just created is called a sleeper. You have a direct way to mount your projector to the ceiling drywall. Mark your holes, hold up the mounting plate and screw directly into the plywood through the drywall. You can also do the same thing with dimesional framing lumber like 2x4s, 2x6s, 2x8s etc. If you have any of this lying around use it. If anybody questions why you always have scraps lying around you can tell them this is why.
Some anchors work great for wall applications but not for a drywall ceiling. In a wall the force is pulling down perpendicular to the connection essentially only needing to keep the connection tight to the wall. Connections for drywall ceilings are different because the force is pulling directly on the anchor. The reliance is solely on how well or mediocre your screws are anchored into the drywall. So keep in mind when you mount a projector to ceiling drywall choose the anchors and connection types you are most comfortable with.
